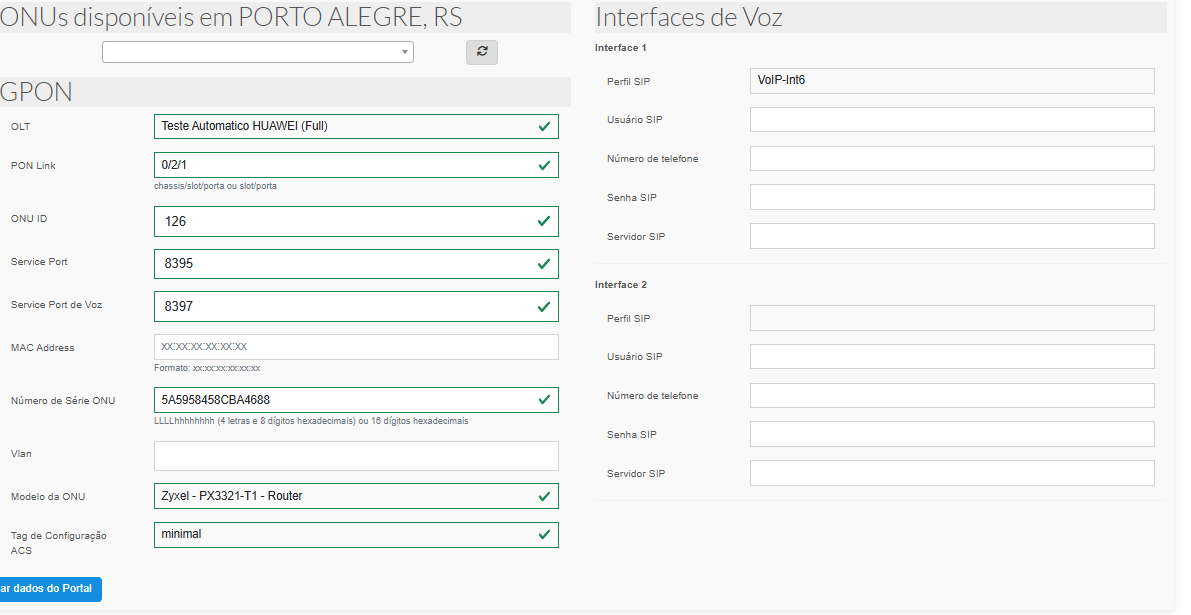
¶ 📡 SIP Profiles
SIP Profiles are used to define VoIP communication parameters during ONU/ONT provisioning. They ensure standardized telephony configurations and integration with OLTs.
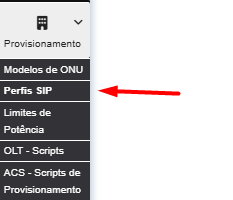
¶ 🔐 Access Control
| Operation | Responsible Party |
|---|---|
| Creation | Customer |
| Editing | Customer |
| Viewing | Customer |
SIP Profiles can be created and managed directly by the customer.
¶ 🔑 Required Permission
The user must have Network Infrastructure editing permission to create and modify SIP Profiles.
¶ 🧩 SIP Profile Details
📌 Fields marked with * are required.
| Field | Description | Required |
|---|---|---|
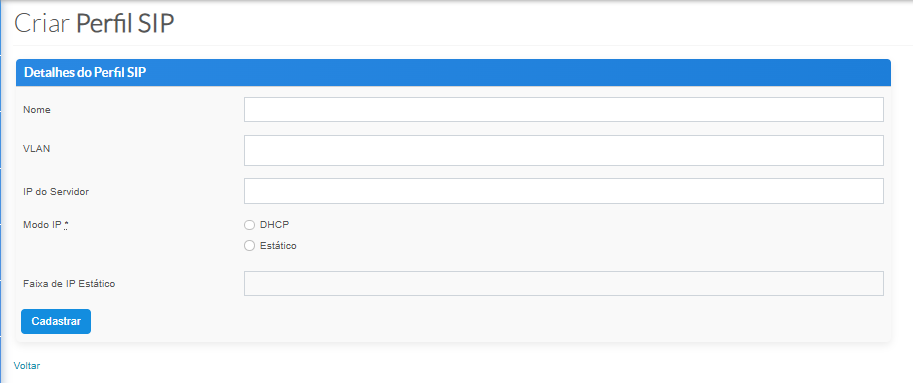
| Name * | SIP profile identifier | ✅ |
| VLAN | VLAN used for voice traffic | ❌ |
| Server IP * | SIP server address (IP or domain) | ✅ |
| IP Mode * | Defines whether the IP address will be obtained via DHCP or configured manually | ✅ |
| Static IP Range | IP range used when Static mode is selected | ❌ |
¶ ⚙️ Advanced Configuration
| Field | Description |
|---|---|
| IP Mode - DHCP | The device automatically obtains an IP address from the network |
| IP Mode - Static | Allows IP addresses to be manually defined and requires an IP range |
| OLT Compatibility | Works with any OLT model through configured PON Scripts |
¶ 🎯 Available Actions
| Action | Description |
|---|---|
| Create | Creates a new SIP Profile |
| Update | Saves changes to the profile |
| Back | Returns to the list |
💡 When you click Save/Update, the profile becomes available for use in VoIP device provisioning.
¶ 📋 Registration Example
SIP Profiles can be created directly by the customer through the system interface.
| Field | Example Value |
|---|---|
| Name | default_voip_profile |
| Server IP | sip.provider.com |
| IP Mode | DHCP |
¶ 🧩 VoIP Provisioning
ONU/ONT provisioning with VoIP can be performed on any OLT model, provided that a PON Script containing the commands required for configuration is available.
| Step | Description |
|---|---|
| 1. Create SIP Profile | Profile must be created beforehand |
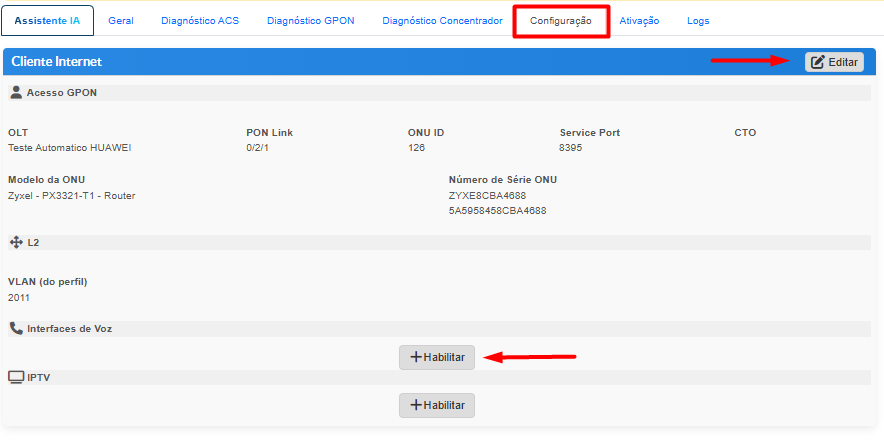
| 2. Access Subscriber | Navigate to the customer in the portal |
| 3. Edit Settings | Access the settings tab |
| 4. Enable Voice Interface | May already be configured automatically through the ERP |
| 5. Edit Provisioning | Access the provisioning screen |
| 6. Reprovision | Apply the configurations to the device |
¶ 🖼️ Step 1 – Creating the SIP Profile
¶ 🖼️ Steps 2 to 5 – Subscriber and Voice Interface Configuration
¶ 🖼️ Step 6 – Reprovisioning